There’s nothing quite as frustrating as flipping the switch on your trusty pedestal fan, only for silence to greet you instead of a refreshing breeze. A non-responsive fan often signals a blown fuse, a small but critical safety component designed to protect the appliance from electrical overload. The good news is that replacing a blown fan fuse is often a straightforward DIY task, saving you money and extending the life of your appliance. This guide will walk you through the process, emphasizing safety and providing clear, actionable steps to get your fan spinning again.
Understanding Your Fan’s Fuse and Why It Blows
Before diving into repairs, it’s essential to understand what a fuse does and why it might have failed. A fuse acts as an electrical safety valve, containing a small wire or filament designed to melt and break the circuit if the electrical current flowing through it exceeds a safe limit. This prevents damage to the fan’s motor and wiring, and more importantly, reduces the risk of overheating and fire.
Fans typically use one of two main fuse types:
- Plug Fuse: Some fans, particularly certain smaller models or those with a built-in surge protector, incorporate a fuse directly within the electrical plug itself. These are generally easier to access and replace.
- Thermal Fuse: More commonly found in pedestal and stand fans, thermal fuses are located inside the motor windings. They are specifically designed to blow if the motor overheats, protecting it from thermal damage, which is often caused by a stalled rotor or excessive load.
Several factors can lead to a blown fuse. Overheating is a primary culprit for thermal fuses; this can occur if the motor is working too hard due to dust accumulation, lack of lubrication in bearings, or if the fan blades are obstructed. Power surges, worn-out wiring, or even the natural aging of the fuse material can also cause it to fail. A blown fuse isn’t always the root problem, but rather a symptom of an underlying issue that caused the overload.
Safety First: Essential Steps Before Any Repair
Working with electrical appliances demands utmost caution. Prioritizing safety is non-negotiable to prevent electric shock or injury. Follow these essential precautions before you begin any repair work on your fan:
- Unplug the Fan Completely: This is the most critical first step. Ensure the fan’s power cord is fully disconnected from the wall outlet.
- Cut Power at the Breaker (If Applicable): For an added layer of safety, especially when dealing with internal wiring, locate the corresponding circuit breaker in your home’s electrical panel and switch it to the “off” position.
- Verify De-energization: Even after unplugging, use a non-contact voltage tester to confirm that no current is flowing to the fan. Hold the tester near the fan’s wiring; the absence of sound or light indicates it’s safe to proceed.
- Wear Protective Gear: Insulated gloves can protect against accidental electrical contact, while safety goggles shield your eyes from debris during disassembly.
- Clear Your Workspace: Ensure your work area is clean, well-lit, and free of any obstructions that could cause trips or accidental contact with tools or fan parts.
- Consider a Helper: Having a second person present can be beneficial for managing tasks and providing immediate assistance in case of an unforeseen incident.
Gather Your Tools and the Right Replacement Fuse
Having the correct tools and the right replacement fuse on hand will make the repair process smoother and more efficient.
Essential Tools:
- Screwdrivers: A set including both Philips-head and flathead screwdrivers of various sizes will be necessary to open the fan’s casing.
- Multimeter: This is invaluable for testing continuity to confirm if a fuse is indeed blown and to check other electrical components.
- Wire Cutters/Strippers: You’ll need these for cutting the old fuse out and preparing wires for the new connection.
- Needle-Nose Pliers or Tweezers: These are useful for handling small components and manipulating wires in tight spaces.
Optional/Conditional Tools (depending on fuse type and fan design):
- Soldering Iron and Solder: Often required for replacing internal thermal fuses that are wired into the motor windings.
- Heat Shrink Tubing or Electrical Tape: Essential for insulating new connections safely.
The Replacement Fuse:
The most crucial “part” is the replacement fuse itself. It is absolutely vital to replace a blown fuse with an identical one. Check the specifications printed on the old fuse or consult your fan’s manual for the correct voltage (V), amperage (A), and temperature rating (for thermal fuses, usually in degrees Celsius). Never use a fuse with a higher amperage rating, as this defeats the safety purpose of the fuse and can lead to serious damage or fire. Fuses are typically inexpensive, costing only a few cents to a few dollars, and can often be purchased in multi-packs online or at electronics stores.
Step-by-Step Guide: Replacing Your Fan’s Fuse
Let’s get your fan back in working order with this detailed repair guide.
1. Initial Troubleshooting
Before assuming the fuse is the culprit, perform a few quick checks:
- Check Another Outlet: Plug your fan into a different electrical outlet that you know is working. If the fan powers on, the problem lies with the original outlet, not the fan itself.
- Inspect the Power Cord: Carefully examine the entire length of the power cord for any visible signs of damage, fraying, cuts, or pinched spots.
- Listen for a Motor Hum: If you hear a faint hum from the motor but the blades aren’t spinning, this could indicate a seized motor, a faulty capacitor, or an issue other than a completely blown fuse.
- Confirm with a Multimeter: If you have access to the fuse (e.g., in the plug), set your multimeter to the continuity setting. Touch the probes to each end of the fuse. A healthy fuse will show a reading (or emit a beep), while a blown fuse will show no continuity (open circuit).
|
Our Picks for the Best Pedestal fan in 2026
As an Amazon Associate I earn from qualifying purchases.
|
||
| Num | Product | Action |
|---|---|---|
| 1 | Lasko Pedestal Fan, Oscillating Fan for Bedroom with Adjustable Height and 3 Cooling Speeds, Portable, 18", Black, 1827 |

|
| 2 | Lasko 2520 Oscillating Stand Fan,White 16 Inch |
|
| 3 | DREO Fan for Bedroom, 2026 Upgraded, 90ft Airflow, 20dB Quiet Fan, 90° Oscillating Standing Fan for Whole Room, DC Motor, 8+H Speeds, 3 Modes, 38-42'' Adjustable Height, 8H Timer, 105° Manual Vertical |
|
| 4 | DREO Fan for Bedroom, 2026 Upgraded, 90ft Airflow, 20dB Quiet Fan, 90° Oscillating Standing Fan for Whole Room, DC Motor, 8+H Speeds, 3 Modes, 38-42'' Adjustable Height, 8H Timer, 105° Manual Vertical |
|
| 5 | Amazon Basics 16" Pedestal Fan with Remote for Bedroom, Living Room, Office, Adjustable Height, Dual-Layered Blades, 3 Speeds, 3 Modes, Timer, Tilt Head, 60W, Black |
|
| 6 | JRD Fan for Bedroom, 70° Oscillating Standing Fan, 100ft Quiet Pedestal Fans for Home Office, 85° Manual Vertical, Touch+Remote, 24H Timer,32 Wind Speeds, 39-43" Adjustable Height, Air Circulator |
|
| 7 | Lasko Oscillating Cyclone Pedestal Fan, Adjustable Height, Timer, Remote Control, 3 Speeds, for Bedroom, Living Room, Home Office, 18", Black, 1843 |
|
| 8 | DREO Fan for Bedroom, 2026 Upgraded, 90ft Airflow, 20dB Quiet Fan, 90° Oscillating Standing Fan for Whole Room, DC Motor, 8+H Speeds, 3 Modes, 38-42'' Adjustable Height, 8H Timer, 105° Manual Vertical |
|
| 9 | PELONIS 16 inch Pedestal Fan for Bedroom , Oscillating Fan, 3-Speeds, 90° Oscillation, Adjustable Height, Floor Fan, Standing Fan for Living Room, Kitchen, and Home office, Black |
|
| 10 | Lasko 2521 16 Inch 3-Speed Quiet Adjustable Tilting Wide-Area Oscillating Standing Pedestal Fan for Bedroom, Kitchen, Home, and Office, Black |
|
2. Locating the Blown Fuse
The location of the fuse determines the next steps in accessing it.
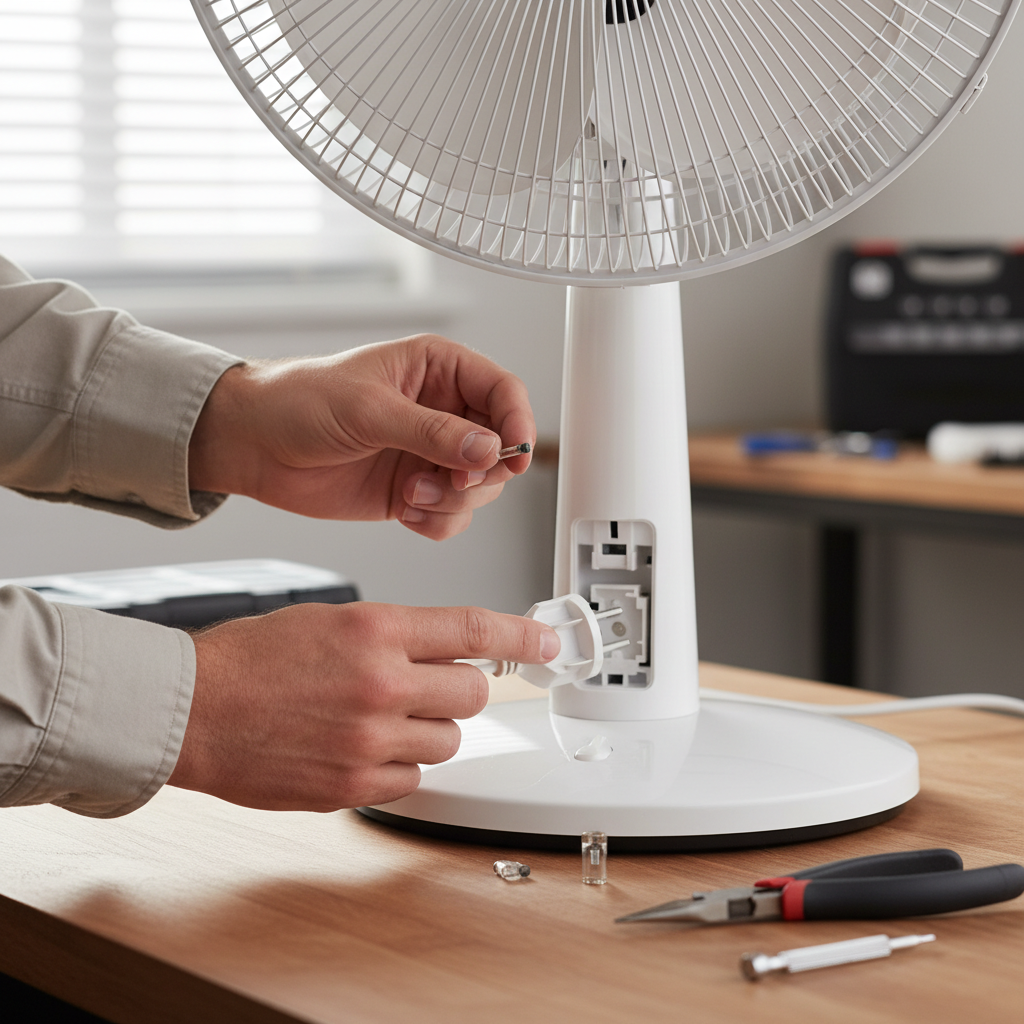
- For Plug Fuses: This is often the simplest scenario. Examine the fan’s electrical plug. Some plugs have a small, sliding compartment or a screw-secured cover. Use a small flathead screwdriver to carefully pry open or slide out this compartment. The fuse, typically a small glass cylinder, will be visible inside.
- For Internal Thermal Fuses: This requires disassembling the fan.
- Begin by removing the fan guard (usually held by clips or screws) and the fan blades (often secured by a cap that twists off).
- Next, you’ll need to open the motor housing. This typically involves removing screws from the back or sides of the motor assembly. Take photos as you go to help with reassembly.
- Once the motor casing is open, carefully locate the thermal fuse. It’s usually a small, cylindrical component, often encased in a protective sleeve or heat shrink tubing, and wired directly into the motor windings or near them. It will have two wires leading away from it.
3. Removing the Old Fuse
Once located, carefully remove the old fuse.
- For Plug Fuses: Gently pop the old fuse out of its clips or holder using your fingers or tweezers.
- For Internal Thermal Fuses: Using wire cutters, carefully snip the wires on either side of the thermal fuse, as close to the fuse body as possible while still leaving enough wire length on the fan’s side for a secure connection. Preserve any protective sleeving or tubing that was around the fuse, as you’ll need it for the new one.
4. Installing the New Fuse
Now it’s time to install the replacement. Remember to always use a fuse with identical specifications to the original.
- For Plug Fuses: Simply insert the new plug fuse into the clips or holder within the plug compartment. Polarity typically does not matter for these types of fuses. Close the compartment securely.
- For Internal Thermal Fuses: This usually involves making a secure electrical connection.
- Prepare Wires: Use wire strippers to expose a small amount of bare wire (about 1/4 to 1/2 inch) from the fan’s wires where the old fuse was cut. If the new fuse has long leads, you may need to trim and strip them too.
- Soldering Method: This is the most reliable method for thermal fuses. Carefully solder the leads of the new thermal fuse to the stripped ends of the fan’s wires. Work quickly with the soldering iron to avoid overheating the new fuse itself, which can cause it to blow prematurely. While polarity usually doesn’t matter for thermal fuses, matching the original orientation is good practice.
- Insulate Connections: After soldering, slide heat shrink tubing over each soldered connection and gently heat it (with a heat gun or lighter) until it shrinks tightly, providing insulation. Alternatively, wrap each connection securely with high-quality electrical tape, ensuring no bare wire is exposed. Re-apply any original protective sleeving around the fuse assembly.
- Secure Fuse Assembly: Neatly tuck the new fuse and its connections back into the motor housing, ensuring that no wires or the fuse itself interfere with the motor’s rotor or moving parts. Use any original string or ties to secure it if present.
5. Reassembly and Final Test
The final steps involve putting your fan back together and checking its operation.
- Reassemble the Fan: Carefully reattach the motor casing, ensuring all screws are tightened securely. Reinstall the fan blades and then the front fan guard. Make sure all parts fit snugly.
- Final Safety Check: Before plugging the fan back in, double-check all connections you made, confirm there are no loose screws or wires, and ensure your workspace is clear.
- Test Your Fan: Plug the fan back into the wall outlet and switch on the power. Listen for the familiar whir of the motor and observe if the blades begin to spin normally. If it works, congratulations, you’ve successfully replaced your fan’s fuse!
When Your Fan Still Won’t Work or the Fuse Blows Again
If your fan still doesn’t operate after replacing the fuse, or if the new fuse blows immediately, it indicates a more significant underlying issue. This could be a motor winding short, a faulty capacitor (which helps the motor start), or seized motor bearings. In such cases, replacing just the fuse won’t solve the problem, and a deeper electrical or mechanical fault needs addressing.
“A blown fuse is often a symptom, not the core issue. If a new fuse blows quickly, it’s a clear signal for a more serious problem with the fan’s motor or wiring that requires a deeper diagnosis.” – DIY Appliance Expert
Crucial Warning: Never, under any circumstances, bypass a fan’s fuse by directly connecting the wires. The fuse is a critical safety device designed to prevent electrical hazards and potential fires caused by overheating. Removing it exposes your home and its occupants to significant risk. If the fuse continues to blow, it’s a strong indicator that the fan is unsafe to operate without professional repair.
At this point, you have two main options: consult a qualified electrician or appliance repair professional, or consider replacing the fan entirely. Often, the cost of professional diagnosis and repair for a complex motor issue can approach or exceed the cost of a new Pedestal Fan.
Conclusion
Replacing a blown fan fuse is a common and often simple DIY repair that can quickly restore your fan’s function. By carefully following safety precautions, correctly identifying the fuse type, gathering the right tools, and meticulously installing the new component, you can breathe new life into your appliance. Remember, a successful repair not only saves money but also provides a satisfying sense of accomplishment. Always prioritize safety, use the correct replacement parts, and recognize when it’s time to call in a professional or invest in a new fan. What kind of cooling relief are you looking forward to most with your newly repaired fan?
Frequently Asked Questions
What exactly causes a thermal fuse to blow?
A thermal fuse blows primarily due to excessive heat. This often happens when the fan’s motor overheats, which can be caused by a jammed or obstructed motor, accumulation of dust and debris impeding airflow, continuous overuse, or failing motor bearings that create increased friction and heat. The fuse acts as a protective mechanism, cutting power before the motor components are permanently damaged or pose a fire risk.
Can I use a higher-rated fuse for replacement?
No, you should never use a higher-rated fuse for replacement. The fuse rating (amperage, voltage, and temperature for thermal fuses) is specifically chosen by the manufacturer to protect the appliance from dangerous overcurrents and overheating. Installing a higher-rated fuse allows more current to flow than the fan is designed to handle, which can lead to motor damage, electrical shorts, or even a fire hazard if the fan overheats. Always replace a fuse with one that precisely matches the original specifications.
Is it ever safe to bypass a fan fuse?
Absolutely not. Bypassing a fan fuse is extremely dangerous and creates a significant fire hazard. The fuse is a critical safety component designed to prevent the fan from overheating or drawing too much current, which could otherwise lead to the motor catching fire. If a fuse blows, it’s signaling a problem. Removing this safety feature means the fan could overheat unchecked, potentially causing serious property damage or injury.
How can I test if a fan fuse is blown?
The most reliable way to test if a fan fuse is blown is by using a multimeter set to the continuity setting. After ensuring the fan is unplugged and de-energized, touch one probe of the multimeter to each end of the fuse. If the fuse is intact, the multimeter will typically beep or display a continuity reading (e.g., a low resistance value). If the fuse is blown, the multimeter will show an open circuit (no reading or “OL”), indicating the internal filament has broken.
How much do replacement fan fuses typically cost?
Replacement fan fuses are generally very inexpensive. A single fuse can cost anywhere from a few cents to a couple of dollars. You can often buy them in multi-packs online or at electronics stores for around $5 to $10 for a handful of fuses. The low cost makes fuse replacement a highly economical repair option compared to buying a new fan.