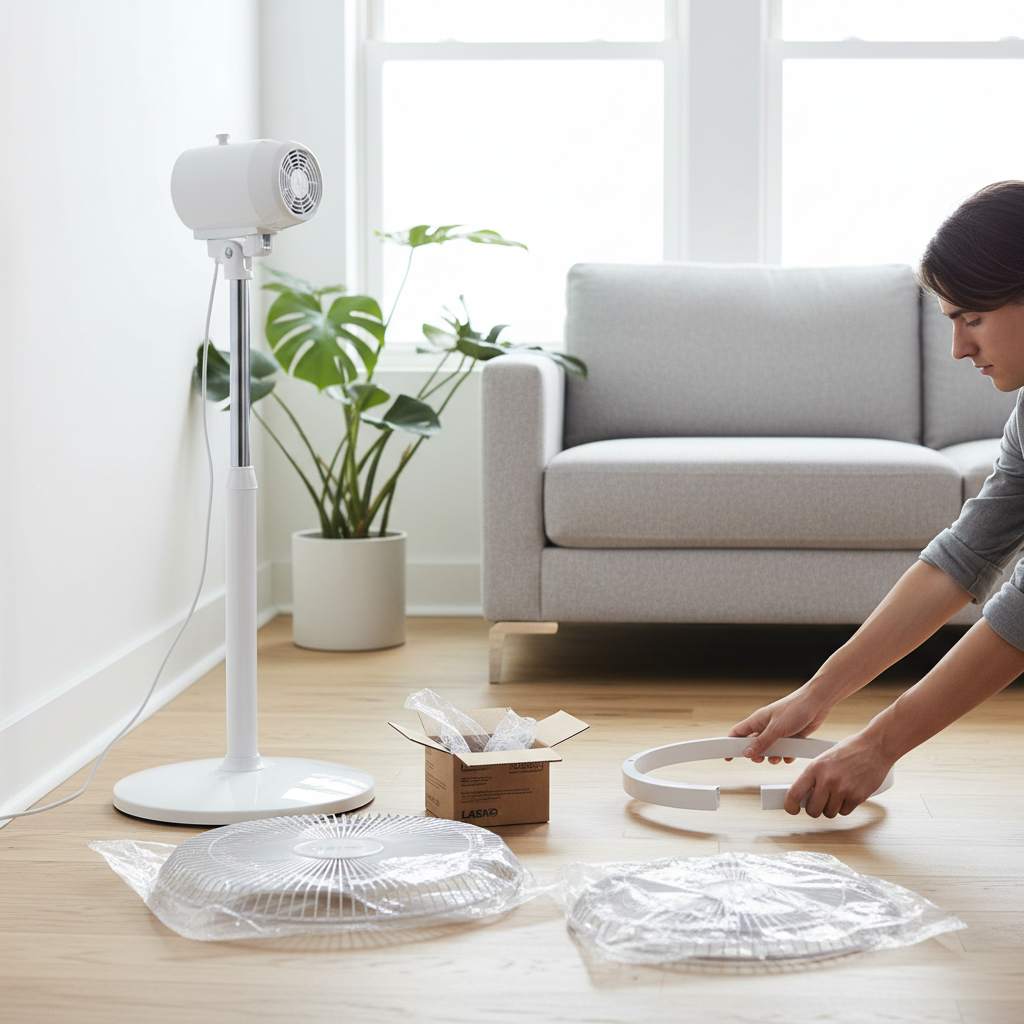
Bringing home a new Lasko pedestal fan promises a welcome breeze, but the thought of assembly can sometimes feel like a daunting task. You want that cool air flowing as quickly as possible without wrestling with complicated instructions or hunting for tools. Fortunately, Lasko pedestal fans are renowned for their straightforward, often tool-free design, allowing you to get from unboxing to enjoying a comfortable breeze in just minutes. This guide will walk you through each step, ensuring a swift and hassle-free setup, so you can transform your space into an oasis of comfort without delay.
Understanding Your Lasko Pedestal Fan Components
Before you begin, it’s helpful to quickly identify the main parts of your Lasko pedestal fan. While specific models might have minor variations, most Lasko pedestal fans consist of a few core components designed for intuitive assembly. You’ll typically find the base, an adjustable pole (often in two sections), the motor housing (which includes the control panel), the fan blade, a rear grille, and a front grille. There will also be various nuts or caps used to secure these parts. Many Lasko models pride themselves on tool-free assembly, meaning you won’t need anything beyond your hands to put it together, often by simply twisting and snapping components into place.
Essential Tools for Lasko Pedestal Fan Assembly
One of the great advantages of Lasko pedestal fans is their user-friendly design, which frequently eliminates the need for extra tools. For many models, you won’t need any screwdrivers, wrenches, or other hardware. The components are engineered to fit snugly together with hand-tightened nuts and snap-on features, allowing for a quick and convenient setup. In rare cases, a small Phillips head screwdriver might be required for a specific screw on certain older or less common models, but this is an exception rather than the rule. Always check your specific model’s manual for any unique requirements, though for the most part, your hands are the only tools you’ll need for a Lasko fan assembly.
Step-by-Step Lasko Pedestal Fan Assembly Guide
Assembling your Lasko pedestal fan can be completed quickly, often in just a few minutes, thanks to its straightforward design. Follow these steps for a fast and efficient setup:
Step 1: Assembling the Base and Pole
|
Our Picks for the Best Pedestal fan in 2026
As an Amazon Associate I earn from qualifying purchases.
|
||
| Num | Product | Action |
|---|---|---|
| 1 | Lasko 2521 16 Inch 3-Speed Quiet Adjustable Tilting Wide-Area Oscillating Standing Pedestal Fan for Bedroom, Kitchen, Home, and Office, Black |

|
| 2 | Lasko Pedestal Fan, Oscillating Fan for Bedroom with Adjustable Height and 3 Cooling Speeds, Portable, 18", Black, 1827 |
|
| 3 | DREO Fan for Bedroom, 2026 Upgraded, 90ft Airflow, 20dB Quiet Fan, 90° Oscillating Standing Fan for Whole Room, DC Motor, 8+H Speeds, 3 Modes, 38-42'' Adjustable Height, 8H Timer, 105° Manual Vertical |
|
| 4 | Amazon Basics 16" Pedestal Fan with Remote for Bedroom, Living Room, Office, Adjustable Height, Dual-Layered Blades, 3 Speeds, 3 Modes, Timer, Tilt Head, 60W, Black |
|
| 5 | JRD Fan for Bedroom, 70° Oscillating Standing Fan, 100ft Quiet Pedestal Fans for Home Office, 85° Manual Vertical, Touch+Remote, 24H Timer,32 Wind Speeds, 39-43" Adjustable Height, Air Circulator |
|
| 6 | Lasko 2520 Oscillating Stand Fan,White 16 Inch |
|
| 7 | DREO Fan for Bedroom, 2026 Upgraded, 90ft Airflow, 20dB Quiet Fan, 90° Oscillating Standing Fan for Whole Room, DC Motor, 8+H Speeds, 3 Modes, 38-42'' Adjustable Height, 8H Timer, 105° Manual Vertical |
|
| 8 | Lasko Oscillating Cyclone Pedestal Fan, Adjustable Height, Timer, Remote Control, 3 Speeds, for Bedroom, Living Room, Home Office, 18", Black, 1843 |
|
| 9 | PELONIS 16 inch Pedestal Fan for Bedroom , Oscillating Fan, 3-Speeds, 90° Oscillation, Adjustable Height, Floor Fan, Standing Fan for Living Room, Kitchen, and Home office, Black |
|
| 10 | DREO Fan for Bedroom, 2026 Upgraded, 90ft Airflow, 20dB Quiet Fan, 90° Oscillating Standing Fan for Whole Room, DC Motor, 8+H Speeds, 3 Modes, 38-42'' Adjustable Height, 8H Timer, 105° Manual Vertical |
|
Begin by taking the two sections of the pole. The narrower, straight-ended pipe needs to be inserted through the wider pipe, coming out the top. Loosen any plastic nut on the top of the larger pipe if present, then slide the smaller pipe through and re-tighten the nut to secure it. Next, firmly insert the combined pole assembly into the base. For many Lasko models, you’ll align a dimple on the top of the base with a corresponding groove on the pole, then twist it until it clicks securely into place, ensuring it is stable.
Step 2: Mounting the Motor Housing
Once your pole and base are stable, it’s time to attach the motor housing. This is the main body of the fan where the controls are located. Locate the hole or opening at the back of the motor housing assembly and align it with the snap or protrusion on the top of the pole. Gently twist the motor housing down onto the pole until it securely locks into position. Make sure it feels firm and doesn’t wobble.
Step 3: Installing the Rear Grille
With the motor housing in place, install the rear grille. This circular mesh piece attaches directly to the front of the motor unit. Line up the tabs or grooves on the rear grille with the corresponding slots on the motor housing. Once aligned, gently push it into place. Then, take the large plastic retaining nut (often found already on the motor shaft) and screw it clockwise onto the motor housing until it is tight, securing the rear grille firmly.
Step 4: Attaching the Fan Blade
Now, it’s time for the fan blade. Look for a groove on the back of the fan blade and align it with the metal pin or flat side on the motor shaft. Slide the blade onto the shaft until it sits flush against the motor. To secure the blade, take the small plastic spinner cap and screw it onto the motor shaft. Be aware that this spinner often tightens in the opposite direction you might expect – counter-clockwise – to ensure it doesn’t loosen during operation. Hold the fan blade steady while tightening the spinner, but avoid overtightening.
Step 5: Fastening the Front Grille
The final step is to attach the front grille. Carefully align the front grille with the rear grille, ensuring that any logos or branding on the front grille are oriented correctly. Most Lasko fans have clips around the circumference of the front grille that snap onto the rear grille. Work your way around the fan, pressing the clips until you hear them click into place. Ensure all clips are securely fastened and the grille feels solid.
Step 6: Final Checks and Powering On
Once the front grille is attached, give your newly assembled Lasko pedestal fan a quick once-over. Check that all components are firmly in place, the pole is stable, and the grilles are securely snapped together. Plug the fan into a suitable power outlet and test its functions. Cycle through the speeds and check the oscillation to ensure everything is working as expected. In just a few minutes, you’ll be ready to enjoy the powerful cooling breeze of your new Lasko fan.
Troubleshooting Common Lasko Fan Assembly Issues
Even with a “fast assembly” design, minor hitches can occur. Here are some common issues and quick fixes:
- Fan Wobble: If the fan feels unstable, double-check that the pole is firmly inserted into the base and any connecting nuts are tightened. Ensure the motor housing is securely twisted onto the pole.
- Blades Not Spinning: This often happens if the blade isn’t properly seated on the motor shaft (ensure the groove aligns with the pin) or if the spinner cap is too loose or overtightened. Make sure the spinner is tightened in the correct direction (often counter-clockwise).
- Grille Not Closing Properly: Ensure the rear grille is fully seated before attempting to attach the front. Check that all tabs and clips are aligned and give a firm, even press around the circumference of the front grille to snap it into place.
- Excessive Noise: A slight hum is normal, but excessive rattling can indicate a loose grille or blade. Re-check these components for tightness.
Tips for a Faster and Smoother Lasko Pedestal Fan Assembly
To make your Lasko pedestal fan assembly even quicker, consider these tips:
- Unpack Everything First: Lay out all components on a clean, flat surface. This helps you quickly identify each part and ensures nothing is missing.
- Scan the Instructions: Even if you prefer to dive right in, quickly skim the provided instruction manual. Lasko often includes helpful diagrams and specific warnings that can save time.
- Work Methodically: Follow the steps in order. Trying to skip ahead can sometimes lead to having to backtrack.
- Use Visual Cues: Pay attention to arrows, labels, or unique shapes on components that indicate proper alignment or direction of rotation for nuts.
Maintenance After Assembly
After assembly, a little ongoing care will keep your Lasko pedestal fan running efficiently. Regularly unplug the fan and use a soft, damp cloth to wipe down the exterior surfaces. For dust buildup on the blades or grilles, you might need to carefully remove the front grille (following assembly steps in reverse) to clean the blades. Always ensure the fan is completely dry before plugging it back in and operating it. Proper maintenance not only ensures optimal performance but also extends the life of your fan.
Why Choose a Lasko Pedestal Fan?
Lasko has been a trusted name in home comfort for over a century, and their pedestal fans are a testament to their commitment to quality and user experience. Beyond their easy assembly, Lasko pedestal fans are known for their reliable performance, durable construction, and efficient air circulation. They offer a range of features, from multiple speed settings and widespread oscillation to adjustable heights and tilt options, allowing you to customize your cooling experience. Choosing a Lasko means opting for a blend of convenience, performance, and long-lasting comfort.
Conclusion
Assembling your Lasko pedestal fan doesn’t have to be a chore. With a clear understanding of its components and a few simple, often tool-free steps, you can have your fan up and running in a matter of minutes. By following this guide, you’ve not only learned how to quickly put your Lasko pedestal fan together but also gained insight into its design and how to maintain it for lasting comfort. It’s a straightforward process designed to get you enjoying that refreshing breeze without any unnecessary delays.
Ready to feel the instant relief? What’s your favorite feature of your Lasko pedestal fan once it’s assembled?
Frequently Asked Questions
How long does it typically take to assemble a Lasko pedestal fan?
Most Lasko pedestal fans are designed for quick assembly, often taking only a few minutes, typically between 5 to 10 minutes, especially for models that require no tools.
Do I need any tools to assemble a Lasko pedestal fan?
For the vast majority of Lasko pedestal fan models, no tools are required for assembly. Components are designed to twist, snap, or hand-tighten into place, making the process incredibly simple.
My Lasko fan wobbles after assembly. What should I check?
If your fan wobbles, ensure the pole is fully inserted and secured into the base, and that the motor housing is firmly attached to the top of the pole. Tighten any plastic nuts or locking mechanisms.
The fan blade isn’t spinning. What could be wrong?
Check that the fan blade is correctly seated on the motor shaft, with its groove aligned with the pin. Also, ensure the spinner cap securing the blade is tightened in the correct direction, which is often counter-clockwise.
Can I adjust the height of my Lasko pedestal fan after assembly?
Yes, most Lasko pedestal fans feature an adjustable height pole. You typically loosen a plastic nut on the pole, extend or retract the inner pole to your desired height, and then re-tighten the nut to secure it.