A pedestal fan is a household staple, providing a refreshing breeze on hot days. Yet, over time, its blades inevitably accumulate a layer of dust, grime, and allergens. This isn’t just an unsightly nuisance; a dirty fan can significantly reduce airflow, work less efficiently, and even circulate dust back into your living space. Cleaning your pedestal fan blades might seem like a chore, but it’s a straightforward DIY task that can dramatically improve your fan’s performance and contribute to a healthier home environment. This comprehensive guide will walk you through every step, ensuring your fan runs like new.
Why Regular Pedestal Fan Cleaning Matters
Many homeowners overlook the importance of regularly cleaning their pedestal fan blades, unaware of the cumulative impact dust can have. Beyond the obvious aesthetic improvement, a clean fan offers substantial benefits for both your comfort and well-being.
Firstly, a buildup of dust on fan blades directly impedes their ability to move air effectively. This results in reduced airflow, forcing your fan to work harder to achieve the same cooling effect, thereby consuming more electricity. Regular cleaning restores optimal airflow, ensuring you get the most out of your appliance and potentially saving on energy costs. Secondly, dusty fans can be a breeding ground for allergens and microscopic particles. As the fan operates, it can inadvertently become a dust circulator, dispersing these particles throughout your room. For individuals with allergies, asthma, or respiratory sensitivities, this can exacerbate symptoms and diminish indoor air quality. A clean fan, on the other hand, helps maintain a cleaner, healthier atmosphere. Lastly, proper maintenance, including routine cleaning, extends the lifespan of your pedestal fan. Dust and debris can strain the motor, leading to overheating and premature wear. By keeping the blades and motor housing clean, you reduce this strain, ensuring your fan serves you efficiently for many years to come. It’s an investment in both your comfort and the longevity of your appliance.
Essential Tools and Cleaning Solutions
Before you begin the cleaning process, gathering all the necessary tools and solutions will make the task smoother and more efficient. Most items are likely already in your home, making this a truly accessible DIY project.
You’ll need a screwdriver (usually Phillips head, but check your fan model) to detach the grilles and sometimes the blades. A soft, lint-free cloth or several are essential for wiping down surfaces without scratching them. For tackling stubborn dust and reaching into crevices, a small brush – like an old toothbrush, a bottle brush, or even a paint brush – will prove incredibly useful. A vacuum cleaner with a brush attachment is excellent for removing large accumulations of dust before wet cleaning. You’ll also want a bucket or basin for mixing cleaning solutions and rinsing parts.
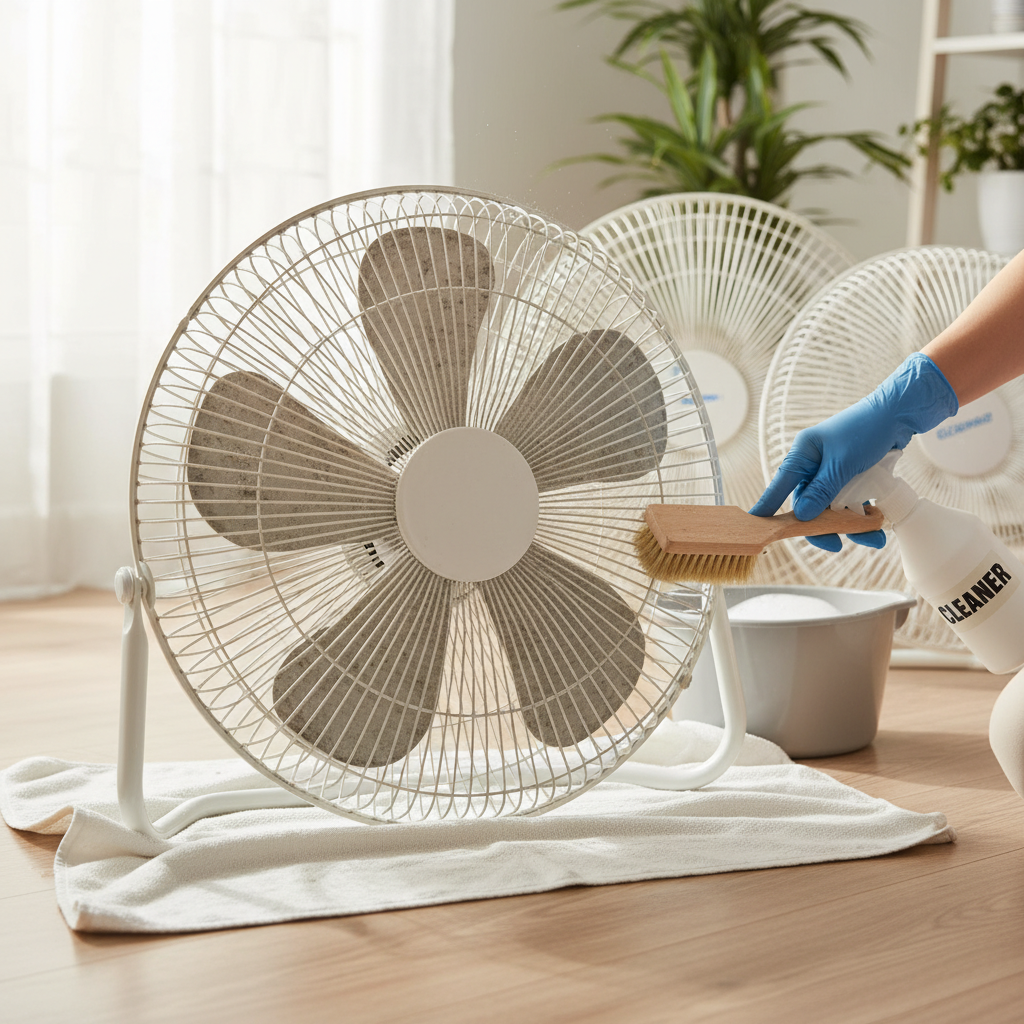
For cleaning solutions, mild dish soap mixed with warm water is a simple yet effective cleaner that breaks down grease and dust without damaging most fan materials. For an all-natural alternative, or to combat mildew, white vinegar mixed with an equal part of warm water in a spray bottle works wonders. Avoid abrasive cleaners or strong chemical solvents, as these can corrode plastic, strip paint, or damage the fan’s finish. Finally, consider wearing gloves to protect your hands, especially if you have sensitive skin or are dealing with particularly grimy blades. With these items at hand, you’re well-equipped to restore your fan to pristine condition.
Step-by-Step Guide to Deep Cleaning Your Pedestal Fan Blades
Deep cleaning your pedestal fan blades is a methodical process that ensures every speck of dust is removed. Follow these steps carefully for the best results and to prevent any damage to your appliance.
1. Safety First: Unplug Your Fan
|
Our Picks for the Best Pedestal fan in 2026
As an Amazon Associate I earn from qualifying purchases.
|
||
| Num | Product | Action |
|---|---|---|
| 1 | DREO Fan for Bedroom, 2026 Upgraded, 90ft Airflow, 20dB Quiet Fan, 90° Oscillating Standing Fan for Whole Room, DC Motor, 8+H Speeds, 3 Modes, 38-42'' Adjustable Height, 8H Timer, 105° Manual Vertical |

|
| 2 | DREO Fan for Bedroom, 2026 Upgraded, 90ft Airflow, 20dB Quiet Fan, 90° Oscillating Standing Fan for Whole Room, DC Motor, 8+H Speeds, 3 Modes, 38-42'' Adjustable Height, 8H Timer, 105° Manual Vertical |
|
| 3 | Lasko 2520 Oscillating Stand Fan,White 16 Inch |
|
| 4 | PELONIS 16 inch Pedestal Fan for Bedroom , Oscillating Fan, 3-Speeds, 90° Oscillation, Adjustable Height, Floor Fan, Standing Fan for Living Room, Kitchen, and Home office, Black |
|
| 5 | DREO Fan for Bedroom, 2026 Upgraded, 90ft Airflow, 20dB Quiet Fan, 90° Oscillating Standing Fan for Whole Room, DC Motor, 8+H Speeds, 3 Modes, 38-42'' Adjustable Height, 8H Timer, 105° Manual Vertical |
|
| 6 | Lasko Oscillating Cyclone Pedestal Fan, Adjustable Height, Timer, Remote Control, 3 Speeds, for Bedroom, Living Room, Home Office, 18", Black, 1843 |
|
| 7 | Lasko 2521 16 Inch 3-Speed Quiet Adjustable Tilting Wide-Area Oscillating Standing Pedestal Fan for Bedroom, Kitchen, Home, and Office, Black |
|
| 8 | JRD Fan for Bedroom, 70° Oscillating Standing Fan, 100ft Quiet Pedestal Fans for Home Office, 85° Manual Vertical, Touch+Remote, 24H Timer,32 Wind Speeds, 39-43" Adjustable Height, Air Circulator |
|
| 9 | Amazon Basics 16" Pedestal Fan with Remote for Bedroom, Living Room, Office, Adjustable Height, Dual-Layered Blades, 3 Speeds, 3 Modes, Timer, Tilt Head, 60W, Black |
|
| 10 | Lasko Pedestal Fan, Oscillating Fan for Bedroom with Adjustable Height and 3 Cooling Speeds, Portable, 18", Black, 1827 |
|
This is arguably the most crucial step in the entire process. Before you touch any part of your fan, always ensure it is completely unplugged from the power outlet. This eliminates any risk of electric shock or accidental startup while you are working on the internal components. Double-check that the plug is fully disconnected from the wall. Safety should always be your top priority when dealing with electrical appliances.
2. Disassemble the Fan Grille and Blades
Most pedestal fans are designed for easy disassembly, but the exact method can vary slightly by model. Start by looking for clips, screws, or a locking mechanism around the edge of the front grille.
- Remove the Front Grille: Carefully unfasten any clips or unscrew the securing screws. Some fans have a simple snap-on front grille. Once unsecured, gently pull the front grille away.
- Unscrew/Remove the Blade Cap and Blades: You’ll typically find a cap or nut in the center of the fan blades. This usually unscrews counter-clockwise (sometimes marked “OFF”). Once the cap is removed, the fan blades should slide directly off the motor shaft. Be gentle to avoid bending the blades.
- Remove the Rear Grille: After the blades are off, there’s usually a large nut or a series of screws holding the rear grille in place. Unscrew these and carefully remove the rear grille. You might also need to remove the small plastic nut that holds the rear grille to the motor housing. Keep all screws and small parts in a safe, designated spot to prevent loss.
3. Clean the Fan Blades Thoroughly
With the components disassembled, you can now give each part the attention it deserves. The blades are often the dirtiest part, so start there.
- Initial Dry Wipe/Vacuum: Before wet cleaning, use your vacuum cleaner with a brush attachment to remove any large clumps of dust, pet hair, and loose debris from the blades and grilles. This prevents turning dry dust into muddy sludge when wet cleaning. A dry, soft cloth can also be used for a preliminary wipe.
- Washing with Soapy Water/Vinegar Solution: Fill a bucket or sink with warm water and a few drops of mild dish soap, or prepare your white vinegar and water solution in a spray bottle. Dip the fan blades and grilles into the soapy water, or spray them generously with the vinegar solution. Use a soft cloth to wipe down all surfaces. For stubborn grime, let the parts soak for a few minutes in the solution.
- Addressing Stubborn Grime: For caked-on dust or greasy residue, gently scrub with your small brush (toothbrush or bottle brush). Pay close attention to the edges and crevices where dust tends to accumulate. Repeat wiping and scrubbing until all surfaces are visibly clean.
- Cleaning the Motor Housing (Caution): While you can wipe down the exterior of the motor housing with a damp cloth, never immerse the motor in water or spray it directly with cleaning solutions, as this can cause severe damage or an electrical hazard. Use a dry cloth or a slightly damp cloth to wipe away dust from the exterior only.
4. Dry All Components Completely
This step is critical for safety and preventing rust or electrical shorts. After washing, rinse all fan blades and grilles under clean running water to remove any soap residue.
- Air Drying: Lay all cleaned components on a clean towel in a well-ventilated area. Allow them to air dry completely. This might take several hours, or even overnight, depending on humidity levels.
- Towel Drying: You can also manually dry each piece with a clean, dry cloth to speed up the process, but always let them air dry for a little longer to ensure absolutely no moisture remains, especially in tight spots.
5. Reassemble Your Pedestal Fan
Once every component is thoroughly dry, it’s time to put your fan back together. Simply reverse the disassembly steps.
- Attach the Rear Grille: Secure the rear grille first, ensuring it’s properly aligned and tightened with its nut or screws.
- Slide On the Fan Blades: Carefully slide the fan blades back onto the motor shaft, ensuring they are facing the correct direction (check markings or how they were originally positioned).
- Secure the Blade Cap: Reattach the blade cap or nut, screwing it clockwise until it’s snug. Do not overtighten, as this can damage the plastic.
- Attach the Front Grille: Position the front grille over the blades and rear grille, aligning any tabs or securing mechanisms. Fasten the clips or screws to hold it firmly in place. Ensure the grille is securely attached to prevent accidental contact with the spinning blades.
6. Final Check and Test
Before plugging your fan back in, do a quick visual inspection. Check that all components are correctly assembled and that there are no loose parts. Once satisfied, plug the fan back into the power outlet and turn it on to a low setting. Listen for any unusual noises and observe the blade rotation. It should run smoothly and quietly, circulating fresh, clean air.
Tips for Maintaining a Clean Pedestal Fan
Keeping your pedestal fan clean doesn’t always require a full deep-clean disassembly. Regular, lighter maintenance can significantly reduce the frequency of intensive cleaning and keep your fan performing optimally throughout the year.
Regular Dusting: Make it a habit to dust the exterior of your fan, including the grilles, at least once a week. You can use a duster, a microfiber cloth, or even the brush attachment of your vacuum cleaner. This prevents dust from building up and clinging to the internal components.
Quick Wipes: Every few weeks, give the grilles and visible parts of the blades a quick wipe with a slightly damp cloth. You can often reach through the grille openings with a thin, flexible cleaning brush or even a ruler wrapped in a cloth to get to the front of the blades without full disassembly. This is a great way to manage minor dust accumulation between deep cleans.
When to Deep Clean: The frequency of deep cleaning depends on several factors: how often you use your fan, the dustiness of your environment (e.g., pet owners might need more frequent cleaning), and whether anyone in your household has allergies. As a general rule, aim for a thorough deep clean, including disassembly, at least once every three months, or at the beginning of each cooling season. If you notice reduced airflow, increased noise, or visible dust on the blades through the grille, it’s definitely time for a deeper clean.
Using Fan Covers: When your fan is not in use, especially during the off-season, consider covering it with a fan cover or even a large plastic bag. This simple step can dramatically reduce the amount of dust that settles on the blades and grilles, making future cleaning much easier.
By incorporating these simple maintenance tips into your routine, you can extend the life of your pedestal fan, maintain its efficiency, and ensure it always circulates fresh, clean air.
Common Issues Caused by Dirty Fans
While often overlooked, the accumulation of dust and grime on your pedestal fan can lead to several noticeable problems that impact both its performance and your indoor environment. Recognizing these issues highlights why regular cleaning is not just a cosmetic task, but a functional necessity.
Reduced Airflow: This is the most immediate and common issue. Dust on the blades acts like a drag, hindering their ability to cut through the air effectively. The fan has to work harder to move less air, resulting in a weaker breeze and diminished cooling power. What you might perceive as a failing fan could simply be one suffocated by dust.
Increased Noise: A dirty fan often becomes a noisy fan. The extra drag on the blades, combined with potential imbalance caused by uneven dust distribution, can lead to rattling, grinding, or a louder hum from the motor as it struggles to push air. If your once-quiet fan has started sounding like a small engine, dust is a prime suspect.
Dust Circulation: Perhaps the most concerning issue, especially for health-conscious individuals, is a dirty fan’s tendency to become a dust disperser. Instead of merely cooling the air, it actively circulates accumulated dust, allergens, pet dander, and other microscopic particles throughout your room. This can significantly worsen indoor air quality, triggering allergies, asthma symptoms, and general respiratory discomfort.
By addressing these issues through regular cleaning, you ensure your pedestal fan functions efficiently, quietly, and, most importantly, contributes positively to a fresh and healthy living space.
Conclusion
Cleaning your pedestal fan blades might seem like a small task, but its impact on your comfort, health, and energy bills is significant. By following this DIY guide, you’ve learned how to safely disassemble, thoroughly clean, and correctly reassemble your fan, restoring its peak performance. Remember, a clean fan circulates fresh air more efficiently, operates quietly, and reduces the spread of allergens, contributing to a healthier living environment. Making regular pedestal fan cleaning a part of your home maintenance routine is a simple yet powerful way to extend its lifespan and ensure you always enjoy a refreshing, clean breeze.
Don’t let dust diminish your comfort any longer. When was the last time your fan truly circulated fresh air?
Frequently Asked Questions
How often should I clean my pedestal fan blades?
The frequency depends on usage and environment. For daily use or homes with pets/allergies, aim for a quick wipe down weekly and a deep clean (with disassembly) every 1-3 months. For occasional use, a deep clean at the beginning and end of the cooling season might suffice.
Can I clean fan blades without disassembling the fan?
Yes, for light dusting. Use a vacuum with a brush attachment through the grilles, or a can of compressed air. A long, flexible duster or a cloth-wrapped ruler can also reach some blade surfaces. However, a deep clean requires disassembly for thoroughness and safety.
What should I do if my fan blades are extremely greasy?
For extremely greasy blades, start by pre-treating with a degreasing dish soap solution or a strong white vinegar spray. Let it sit for 5-10 minutes to break down the grease before scrubbing with a brush and warm, soapy water. Multiple washes might be necessary. Always rinse thoroughly and dry completely.